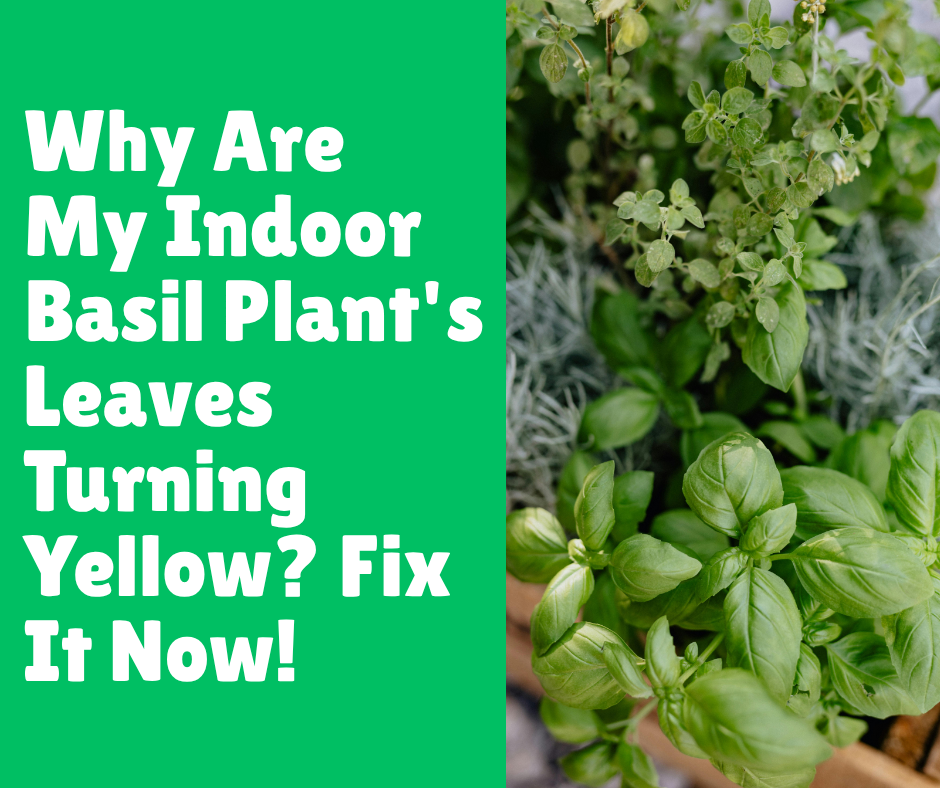
Why Are My Indoor Basil Plant’s Leaves Turning Yellow? Fix It Now!
Post Disclaimer
Content on this site is for educational use only and not a substitute for medical advice. Herbal remedies are based on traditional knowledge and not medical recommendations. Please consult a healthcare professional before trying any herb. We do not assume responsibility for any outcomes or adverse effects resulting from the use of information provided here.
I remember the first time it happened. I had this beautiful, lush basil plant sitting on my kitchen windowsill. It was my pride and joy, my secret weapon for amazing pasta sauces and caprese salads.
Then, one morning, I saw it: a single, sad, yellow leaf. I plucked it off, thinking it was a fluke. But the next day, there were three more. Soon, my vibrant green herb was looking like it was ready for autumn. It was a total plant-parent nightmare.
If you’re reading this, chances are you’re staring at your own basil plant with a similar sense of dread. You’ve given it love, water, and a sunny spot, but its leaves are still staging a yellow protest. What gives? Don’t panic and definitely don’t toss it in the compost bin just yet.
I’ve been there, and I’ve learned a lot through trial, error, and a little bit of plant detective work. Those yellow leaves are a cry for help, and the good news is, you can almost always answer that call and bring your basil back from the brink.
In this guide, I’m going to walk you through everything you need to know to diagnose and fix the yellowing on your indoor basil plant. We’ll cover the most common culprits, step-by-step solutions, and the simple mistakes many of us make. Let’s get that green back.
Decoding the Yellow: What Your Basil Is Trying to Tell You
Before we can fix the problem, we need to play detective. Yellow leaves, a condition scientifically known as chlorosis, aren’t a disease in themselves. Instead, they are a symptom that something is off in your plant’s environment.
Chlorosis simply means the leaf isn’t producing enough chlorophyll, the pigment that makes leaves green and powers photosynthesis.
Think of each yellow leaf as a clue. The location and pattern of the yellowing can tell you a lot. Are the bottom leaves turning yellow first? Or is it the new growth at the top? Is the whole leaf yellow, or just the veins? Let’s break down the prime suspects.
Suspect 1: The Watering Woes
Watering is, without a doubt, the number one reason indoor basil plants start to look sickly. It’s a delicate balance; both too much and too little water can lead to yellow leaves. IMO, this is where most new plant owners stumble.
Overwatering: The Most Common Culprit
I get it. You love your basil plant, so you want to shower it with affection… and water. But basil plants hate having “wet feet.” When the soil is constantly soggy, the roots can’t breathe. This leads to a dreaded condition called root rot. The roots start to decay, and they can no longer absorb water and nutrients effectively. The first sign? Those lower leaves start turning a sad, limp yellow and may feel soft or mushy.
How to Check for Overwatering:
- The Finger Test: Stick your finger about an inch or two into the soil. If it feels wet or muddy, you’re overwatering. The soil should feel slightly moist, like a wrung-out sponge, not saturated.
- The Pot Check: Lift the pot. Does it feel unusually heavy for its size? That’s a sign of waterlogged soil.
- The Smell Test: Gently lift the plant from its pot and sniff the roots. Healthy roots smell earthy. Rotting roots have a distinct, foul, swampy odor. You can’t miss it.
Underwatering: The Other Side of the Coin
On the flip side, if you’re a forgetful waterer, your basil will also protest. When a plant doesn’t get enough water, it starts to conserve resources. It will sacrifice its older, lower leaves to keep the new growth at the top alive. These leaves will turn yellow, become brittle and crispy, and eventually fall off. The plant might also look droopy and wilted overall.
How to Check for Underwatering:
- The Finger Test Again: If the soil is bone-dry and pulling away from the sides of the pot, your plant is thirsty.
- The Weight Test: A very light pot is a clear indicator of dry soil.
- The Wilting Sign: The whole plant will look sad and droopy, like it just ran a marathon without a water break.
Suspect 2: Nutrient Deficiencies
Your indoor basil plant is living in a contained environment—its pot. It relies entirely on you to provide the food it needs to thrive. After a while, the plant will use up all the available nutrients in the soil. When it starts running low on key minerals, it will show its distress with yellow leaves.
The Big One: Nitrogen Deficiency
Nitrogen is the most common nutrient deficiency you’ll see. It’s a mobile nutrient, which means the plant can move it from older parts to newer parts. So, when nitrogen is scarce, the plant will pull it from the oldest, lowest leaves to fuel new growth at the top.
This results in a classic pattern: the bottom leaves turn uniformly yellow and eventually drop off, while the top of the plant might still look relatively green.
Other Nutrient Issues
While less common than nitrogen deficiency, other missing nutrients can also cause yellowing:
- Magnesium Deficiency: This often appears as yellowing between the green veins of the older, lower leaves, creating a “marbled” or “arrowhead” pattern.
- Iron Deficiency: This looks similar to magnesium deficiency, but it typically affects the newest, youngest leaves at the top of the plant. The leaves turn yellow, but the veins remain dark green.
- Potassium Deficiency: You might see the edges of the lower leaves turn yellow and then brown, as if they’ve been scorched.
Suspect 3: The Wrong Light Situation
Basil is a sun-worshipping herb native to warm, bright climates. It craves light. If your basil isn’t getting enough sun, it can’t photosynthesize properly.
The result? A weak, leggy plant with pale green or yellowing leaves, especially on the parts of the plant that are most shaded. It’s stretching out, desperately seeking more light.
How much is enough? A happy indoor basil plant needs at least 6 to 8 hours of direct, bright sunlight per day. A south-facing window is ideal. If you don’t have one, your plant will let you know with its sad, yellow demeanor.
FYI, an east- or west-facing window might work, but a north-facing one is almost always a no-go for basil.
Suspect 4: Pests and Diseases
Sometimes, the yellowing isn’t your fault at all. Tiny, unwelcome guests might have moved in. Pests like aphids, spider mites, and whiteflies feed on the sap of the plant, literally sucking the life out of its leaves.
This feeding frenzy causes stippling tiny yellow or white spots that can eventually merge, causing the entire leaf to turn yellow and die.
How to Spot Pests:
- Look Closely: Inspect the undersides of the leaves and the joints where leaves meet the stem. Pests love to hide there.
- Aphids: These are small, pear-shaped insects that can be green, black, or yellow.
- Spider Mites: These are almost microscopic. You’re more likely to see their fine, silky webbing, especially around the new growth.
- Whiteflies: These tiny, moth-like insects will fly up in a cloud when you disturb the plant.
Diseases like downy mildew can also cause problems. This appears as yellowing on the top of the leaves with a fuzzy, grayish mold on the undersides.
The Action Plan: Your Step-by-Step Fix for Yellow Leaves
Okay, detective work is done. You have a prime suspect. Now it’s time to take action and nurse your basil back to health.
Fixing Your Watering Routine
This is the most critical fix. You need to get this right for long-term success.
Step 1: Assess the Damage. If you suspect overwatering and root rot, you need to act fast. Gently slide the plant out of its pot. If the roots are brown, mushy, and smelly, you have root rot.
Step 2: Perform Root Surgery (If Necessary). If you found root rot, it’s time for an emergency operation.
- Gently rinse the old soil from the roots.
- Using clean, sharp scissors, trim away all the dead, mushy roots. Be ruthless. You need to remove all the rot.
- Repot the plant in a clean pot with fresh, well-draining potting mix. Don’t reuse the old, contaminated soil.
Step 3: Repot for Success. Basil needs excellent drainage. Make sure your pot has at least one large drainage hole. I always use a terra cotta pot for my basil; the porous clay helps wick away excess moisture, providing a great buffer against overwatering.
Step 4: Adopt the Right Watering Method.
- Water deeply but infrequently. Wait until the top 1-2 inches of soil are dry to the touch.
- When you do water, water thoroughly until it runs out of the drainage hole. This ensures all the roots get a drink and flushes out any salt buildup.
- Dump the excess water from the saucer. Never, ever let your basil sit in a puddle of water.
- Water the soil, not the leaves. Wet leaves can encourage fungal diseases.
Solving Nutrient Deficiencies
If you’ve ruled out watering issues and your plant has been in the same pot for more than a few months, it’s probably hungry.
Step 1: Start Feeding Your Plant. Get a balanced, all-purpose liquid fertilizer. Look for one where the three numbers on the label (N-P-K) are relatively even, like 10-10-10 or 20-20-20.
Step 2: Fertilize Correctly.
- Dilute, dilute, dilute! This is key. Fertilize at half-strength or even quarter-strength. Over-fertilizing can “burn” the roots and cause more harm than good.
- Fertilize every 2-4 weeks during the growing season (spring and summer). Cut back in the fall and winter when growth slows.
- Never fertilize a dry plant. Water your basil first, then apply the diluted fertilizer. This prevents root burn.
Within a couple of weeks of starting a regular feeding schedule, you should see the new growth coming in much greener and healthier. Remember to trim off the old, yellowed leaves, as they won’t recover.
Perfecting the Lighting
Is your basil looking pale and stretchy? It’s screaming for more light.
Step 1: Find the Sunniest Spot. Relocate your plant to the brightest window you have, preferably one that faces south.
Step 2: Consider a Grow Light. If you simply don’t have enough natural light in your home (welcome to my world in the winter), a grow light is a game-changer.
You don’t need a fancy, expensive setup. A simple full-spectrum LED bulb screwed into a desk lamp will do wonders. Position the light 6-12 inches above the plant and leave it on for 12-14 hours a day.
This small investment can make the difference between a thriving basil plant and a perpetually struggling one. Seriously, it’s worth it.
Dealing with Pests and Diseases
If you’ve discovered an infestation, it’s time to evict those unwanted tenants.
Step 1: Isolate the Plant. Immediately move the affected plant away from any other houseplants to prevent the pests from spreading.
Step 2: Get Rid of Them.
- For a light infestation, you can often dislodge pests like aphids with a strong spray of water.
- For more stubborn pests, use insecticidal soap or neem oil. These are less harsh than chemical pesticides and are safe for herbs. Mix according to the package directions and spray the entire plant, making sure to coat the undersides of the leaves.
- You may need to repeat the treatment every 5-7 days for a few weeks to break the pest life cycle.
Common Mistakes to Avoid (That I’ve Definitely Made)
We all make mistakes, but learning from them is what turns a novice into a green thumb. Here are a few common blunders to watch out for.
- Using a Pot Without Drainage: This is a death sentence for basil. It’s the equivalent of forcing your plant to wear soggy socks 24/7. No matter how pretty the pot is, if it doesn’t have a hole in the bottom, don’t use it.
- Starting with a Huge Pot: It seems logical to give your plant plenty of room to grow, right? Wrong. A pot that’s too large holds a massive amount of soil that stays wet for too long, which dramatically increases the risk of root rot. Start with a smaller pot (around 4-6 inches) and only size up when the plant becomes root-bound.
- Ignoring the Need to Prune: Basil needs to be pruned regularly to encourage bushy, healthy growth. If you only ever pick off the big lower leaves, the plant will become tall, woody, and “leggy.” You should be pinching off the top sets of leaves right above a leaf node. This encourages the plant to branch out, creating a fuller plant and delaying flowering.
- Letting It Flower: It might look pretty, but once a basil plant flowers, its job is done. It puts all its energy into producing seeds, and the leaves will lose their flavor and the plant will start to die back. As soon as you see a flower stalk starting to form at the top, pinch it off immediately.
Conclusion: You’ve Got This!
Seeing yellow leaves on your beloved basil can be disheartening, but it’s rarely a lost cause. More often than not, it’s your plant’s way of communicating a simple need. By playing detective and working through the likely culprits, you can quickly get to the root of the problem.
Now you have the knowledge and the action plan to turn your yellowing basil back into the vibrant, aromatic herb you love. Don’t be afraid to get your hands dirty, make adjustments, and observe how your plant responds.
What has been your biggest challenge with growing basil indoors? Have you battled the yellow leaves and won? Share your stories, tips, or questions in the comments below. Let’s help each other grow better