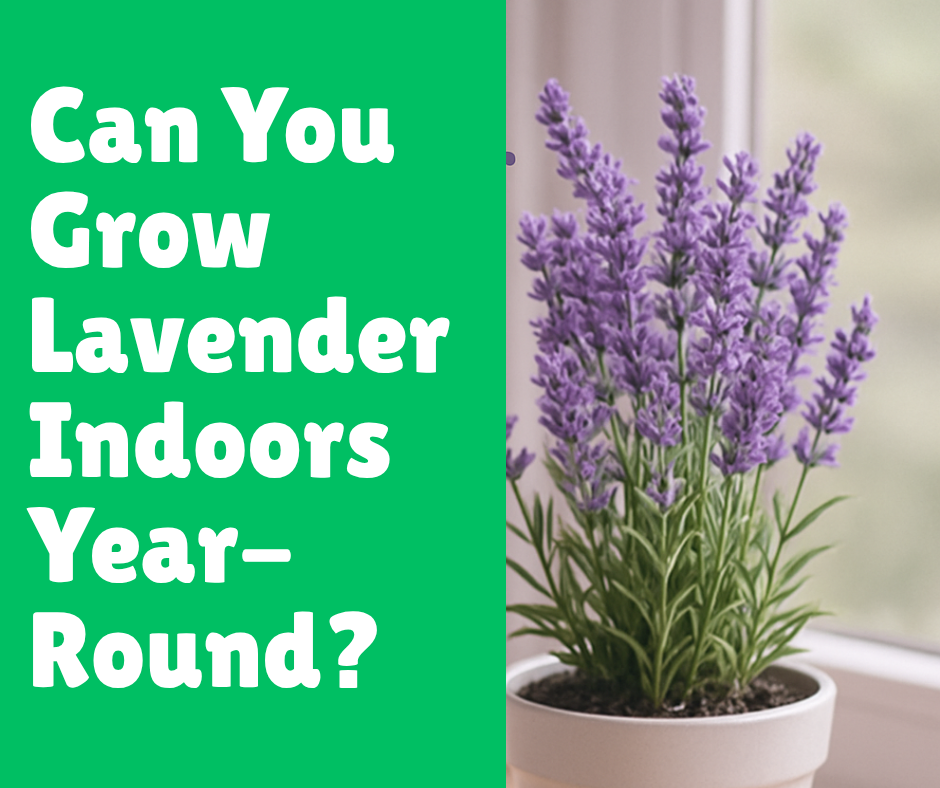
Can You Grow Lavender Indoors Year-Round?
Post Disclaimer
Content on this site is for educational use only and not a substitute for medical advice. Herbal remedies are based on traditional knowledge and not medical recommendations. Please consult a healthcare professional before trying any herb. We do not assume responsibility for any outcomes or adverse effects resulting from the use of information provided here.
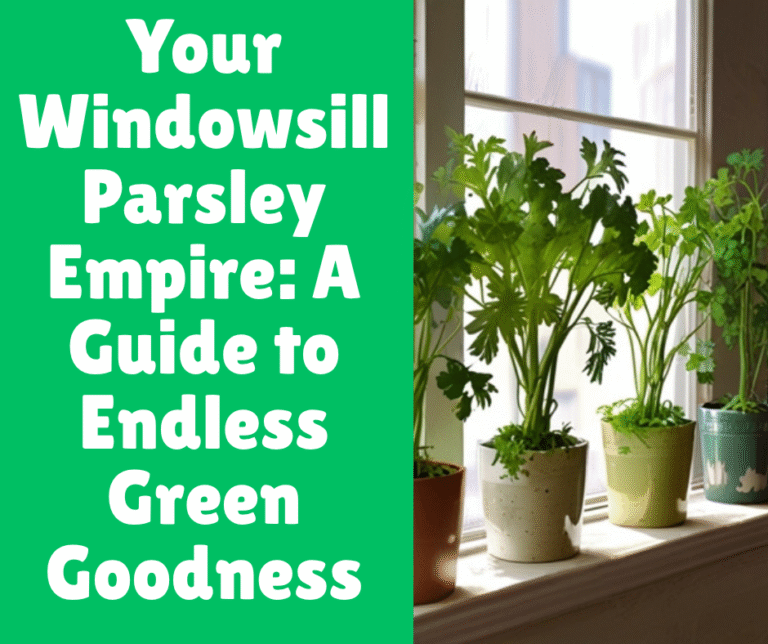
I’ve always dreamed of having that classic, rustic kitchen filled with bundles of fragrant, drying herbs. You know the one it looks like it’s straight out of a picturesque French countryside cottage. At the top of my list for this fantasy setup? Lavender.
The problem is, I live in a place where the weather can be, let’s say, a little dramatic. So, the dream of a sprawling outdoor lavender field was quickly replaced by a more practical question: can I bring this fragrant beauty indoors?
The short answer is a resounding yes, you absolutely can grow lavender indoors year-round. But, and this is a big but, it’s not as simple as sticking a plant on your windowsill and hoping for the best. Lavender is a Mediterranean sun-worshipper by nature. It craves sunshine, hates having its feet wet, and can be a bit of a diva if its needs aren’t met.
I learned this the hard way. My first attempt was a beautiful, but ultimately doomed, French lavender I bought on a whim. I treated it like my other houseplants, and within a month, it was a sad, grey, wilted mess. But I’m stubborn.
I was determined to have that fresh lavender scent in my home without relying on essential oil diffusers. After a lot of research, trial, and (let’s be honest) a few more plant casualties, I finally cracked the code. And I’m here to share everything I’ve learned so you can skip the heartbreak and go straight to fragrant success.
Choosing Your Indoor Lavender Champion
Before you even think about soil or pots, you need to pick the right plant for the job. Not all lavenders are created equal, especially when it comes to indoor living. Some varieties are massive, woody shrubs that would laugh at the idea of being confined to a pot. Others are much more adaptable.
The Best Lavender Varieties for Indoor Growing
You want to look for smaller, more compact varieties. These are often called dwarf or semi-dwarf types. They are bred to stay manageable in size, which is perfect for containers. Here are my top picks:
- ‘Munstead’ (English Lavender): This is a fantastic choice for beginners. It’s a compact English lavender (Lavandulaangustifolia) that stays relatively small and is known for its sweet fragrance and beautiful purple flowers. It’s also one of the more cold-hardy varieties, which weirdly helps it adapt to the temperature fluctuations inside a home.
- ‘Hidcote’ (English Lavender): Another English variety, ‘Hidcote’ is prized for its deep, violet-blue flowers and strong scent. It’s also a compact grower, making it an excellent container plant.
- ‘Jean Davis’ (English Lavender): If you want something a little different, this one’s for you. It produces pale pink to white flowers but still has that classic lavender scent. It’s a lovely, delicate-looking plant.
- French Lavender (Lavandulastoechas): Okay, so this is the one I failed with initially, but I’ve since made my peace with it. French lavender, also called Spanish lavender, is famous for its unique, pineapple-shaped flower heads with prominent “bunny ears” or bracts on top. It’s a bit more sensitive to overwatering and needs even more sun than its English cousins, but its stunning appearance makes the extra effort worthwhile. Just be prepared to give it your sunniest spot.
- ‘Goodwin Creek Grey’ (Hybrid Lavender): This is a hybrid that has become one of my absolute favorites for indoor growing. It has beautiful, silvery-grey foliage and long, slender spikes of deep purple flowers. It’s known for being a bit more tolerant of indoor conditions than some other types.
Where to Get Your Plant
You have a couple of options here: starting from seed or buying a starter plant.
- Starting from Seed: I’ll be blunt—this is the expert-level difficulty setting. Lavender seeds are notoriously slow and tricky to germinate. They require a period of cold stratification (a fancy term for pretending it’s winter), and even then, germination can be spotty. If you’re a gardening novice or just want to enjoy lavender sooner rather than later, I’d skip this route.
- Buying a Starter Plant: This is the way to go, IMO. Head to your local nursery or garden center in the spring or summer. Look for a small, healthy-looking plant with vibrant foliage. Check the roots! Gently slide the plant out of its pot. If the roots are a tangled, dense mat, it’s root-bound and might struggle. Look for healthy, white roots with plenty of room to grow. Avoid plants that already look wilted or have yellowing leaves.
Creating the Perfect Indoor Mediterranean Climate
Now that you have your lavender plant, your mission is to trick it into thinking it’s basking on a sunny hillside in Provence, not sitting in your living room. This all comes down to four key elements: light, water, soil, and air.
Step 1: Let There Be (Lots of) Light
This is the single most important factor for happy indoor lavender. Lavender needs at least 6-8 hours of direct, bright sunlight per day. I can’t stress this enough. A little morning sun from an east-facing window isn’t going to cut it.
Your best bet is a south-facing window where the plant can get blasted with sun all day long. If you don’t have a window that gets this much light (and let’s be real, many of us don’t), you’re not out of luck. You’ll just need to bring in reinforcements.
A full-spectrum LED grow light is a game-changer. I have one on a simple timer, and it’s the only reason my lavender thrives through the dark winter months. Position the light about 6-12 inches above your plant and set the timer for 12-14 hours a day. This mimics the long, sunny days lavender craves and will prevent it from becoming leggy and weak.
Step 2: The Right Pot and Soil
Remember how lavender hates wet feet? The pot and soil you choose are your primary weapons against root rot, the number one killer of indoor lavender.
- The Pot: Terracotta or clay pots are your best friends. Why? They are porous, meaning they allow air and moisture to move through the sides of the pot. This helps the soil dry out more evenly and quickly, which is exactly what lavender wants. Make sure your pot has at least one large drainage hole at the bottom. No drainage hole is a non-negotiable dealbreaker. Choose a pot that is only 1-2 inches larger in diameter than the root ball of the plant. A pot that’s too big will hold excess soil and moisture, leading to rot.
- The Soil: Do not, I repeat, do not use standard potting mix straight out of the bag. It’s designed to retain moisture, which is lavender’s worst nightmare. You need to create a gritty, fast-draining mix. Think of the rocky, sandy soils of the Mediterranean.
Here is my go-to recipe for the perfect indoor lavender soil:
- 1 part high-quality potting mix
- 1 part perlite or coarse sand (to improve drainage)
- 1 part small gravel or chicken grit (to add air pockets)
Mix these components together thoroughly. When you squeeze a handful, it should feel gritty and fall apart easily, not clump together like mud. I also like to add a tablespoon of crushed eggshells or lime to the mix. Lavender prefers a slightly alkaline soil (a higher pH), and this little addition helps achieve that.
Step 3: The Art of Watering
If you tend to overwater your plants, you need to reform your ways for lavender. This is where most people go wrong. The rule is simple: water deeply, but infrequently.
Here’s how to do it right:
- Check the Soil: Before you even think about picking up the watering can, stick your finger about two inches deep into the soil. Is it completely dry? If yes, it’s time to water. If you feel any moisture at all, wait another day or two and check again.
- Water Thoroughly: When it is time to water, don’t just give it a little sip. Take the plant to the sink and water it until you see water flowing freely from the drainage hole. This ensures the entire root ball gets hydrated.
- Let it Drain: Let the pot sit in the sink for 15-20 minutes to drain completely. Never let your lavender pot sit in a saucer full of water. This is a one-way ticket to root rot.
In the winter, your plant’s growth will slow down, and you’ll need to water even less often—maybe only once every three or four weeks. Always let the soil be your guide.
Step 4: Airflow is Your Ally
Lavender thrives in breezy, open areas. Stagnant, humid air can lead to fungal issues. To keep your plant happy, ensure it has good air circulation.
Don’t cram it into a tight corner with a bunch of other plants. Give it some personal space. If your home is particularly stuffy, running a small fan in the room for a few hours a day can make a huge difference. This mimics the natural breezes lavender loves and helps keep its foliage dry.
Ongoing Care and Maintenance
You’ve got the basics down. Now, how do you keep your lavender looking and smelling its best for years to come? It comes down to feeding, pruning, and knowing when to repot.
To Feed or Not to Feed?
Here’s some good news for the lazy gardener in all of us: lavender does not need much fertilizer. It’s adapted to thrive in nutrient-poor soil. In fact, over-fertilizing can be harmful. Too much nitrogen will encourage lots of leafy growth but very few of those fragrant flowers we’re all after.
I recommend giving your lavender a very light feeding only once a year, in the early spring, just as new growth starts to appear. Use a low-nitrogen, balanced liquid fertilizer diluted to half-strength. That’s it. Seriously. No more feeding for the rest of the year.
Pruning for Health and Flowers
Pruning is essential for keeping your indoor lavender from becoming a woody, leggy mess. It encourages bushier growth and more flower production. Don’t be scared—it’s easier than it sounds.
- After Flowering: The main pruning should happen right after the first flush of flowers fades. Snip off the spent flower stalks and about one-third of the green, leafy growth. This encourages the plant to put its energy into producing more leaves and potentially a second round of blooms.
- Avoid Cutting into Old Wood: When you prune, be careful to only cut the green, soft stems. Never cut back into the old, brown, woody part of the plant. Lavender will not regrow from old wood, so cutting into it can create permanent bare spots or even kill the plant.
- Light Tidying: Throughout the year, you can give the plant a light “haircut” to maintain its shape and remove any dead or yellowing leaves.
Repotting Your Lavender
You’ll likely need to repot your lavender every one to two years, or whenever it becomes root-bound. You’ll know it’s time when you see roots peeking out of the drainage hole or when the plant seems to dry out almost immediately after watering.
When you repot, choose a new container that is only 1-2 inches wider than the current one. Don’t be tempted to jump to a massive pot, as this will only lead to the soil staying wet for too long. Use the same gritty, fast-draining soil mix we talked about earlier and water it well after repotting to help it settle in.
Common Mistakes to Avoid (That I Totally Made)
Learning from others’ mistakes is way cheaper than making them all yourself. Here are some of the traps I fell into so you don’t have to.
- The “Loving It to Death” Syndrome: This is all about overwatering. I was so anxious about my first plant that I watered it every few days “just in case.” Big mistake. Lavender is tough; it would much rather be too dry than too wet. When in doubt, don’t water.
- Using a Giant Pot: I thought giving my lavender a big, roomy pot would make it happy. I was wrong. A pot that’s too large for the root ball holds onto a huge amount of soil that the roots can’t reach. This soil stays soggy forever and creates the perfect environment for rot. Stick to small, incremental pot size increases.
- Ignoring the Sun’s Path: I initially placed my lavender in an east-facing window. It got lovely, gentle morning sun. And it was miserable. The plant grew long, pale, and floppy, stretching desperately toward the light. It wasn’t until I moved it to a south-facing window (and later added a grow light) that it truly started to thrive. Track the sun in your home before you decide on a spot.
- Skipping the Pruning: For a while, I was too afraid to prune. What if I cut the wrong part? My plant became woody at the base with all the new growth just at the tips, looking like a sad little tree. Regular, light pruning is key to keeping the plant compact, bushy, and full of life.
Conclusion: Your Year-Round Fragrant Companion
Growing lavender indoors year-round isn’t just possible; it’s incredibly rewarding. There’s nothing quite like brushing past your plant and having that calming, beautiful scent fill the air, especially in the dead of winter. It’s a little slice of summer you can enjoy any day of the year.
It might seem like a lot of rules for one plant, but once you get into the rhythm, it becomes second nature. Your lavender will reward your efforts with years of beauty and fragrance.
So, are you ready to give it a try? I’d love to hear about your indoor lavender adventures! Share your experiences, successes, or even your questions in the comments below.
Frequently Asked Questions (FAQs)
Why are the leaves on my indoor lavender turning yellow?
Yellowing leaves on lavender are almost always a sign of overwatering. The soil is staying too wet, and the roots are starting to suffer. Immediately stop watering and check your pot for drainage. Make sure you’re letting the soil dry out completely between waterings.
My indoor lavender isn’t flowering. What am I doing wrong?
The most common reason for a lack of flowers is insufficient light. Lavender needs a huge amount of direct sun to produce blooms. If your plant looks healthy and green but just isn’t flowering, try moving it to a sunnier spot or supplementing with a grow light for 12-14 hours a day.
Can I use the lavender I grow indoors for cooking or tea?
Absolutely! As long as you choose an English lavender variety (Lavandulaangustifolia), like ‘Munstead’ or ‘Hidcote’, you’re good to go. These are known as culinary lavenders and have a sweet, floral flavor. Other types, like French or Spanish lavender, have a much higher camphor content, which can make them taste medicinal or soapy.
My lavender smells amazing, but it looks all woody and bare at the bottom. Can I fix it?
This happens when the plant hasn’t been pruned regularly. Unfortunately, lavender will not grow new leaves from that old, woody base. You can’t reverse it, but you can prevent it from getting worse. Give the plant a good prune, cutting back about one-third of the green growth. This will encourage it to become bushier on top.