Perennial Herbs: A Year-Round Guide to Outdoor Growth
Post Disclaimer
Content on this site is for educational use only and not a substitute for medical advice. Herbal remedies are based on traditional knowledge and not medical recommendations. Please consult a healthcare professional before trying any herb. We do not assume responsibility for any outcomes or adverse effects resulting from the use of information provided here.
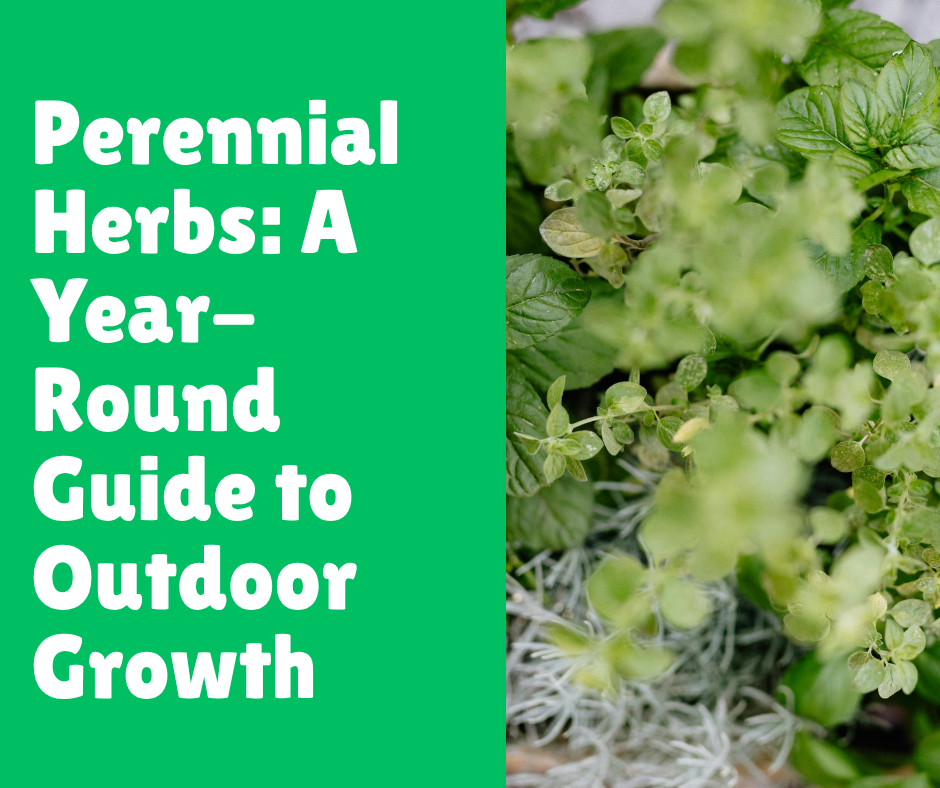
There’s a special kind of magic in stepping out your back door to snip fresh herbs for your evening meal. The scent of rosemary on your fingers, the vibrant green of thyme, the velvety texture of a sage leaf these aren’t just ingredients; they’re experiences.
For years, I thought this luxury was fleeting, something to be savored only during the peak of summer. Then I discovered the world of perennial herbs, and it completely changed my garden and my kitchen.
Perennial herbs are the gifts that keep on giving. Unlike annuals, which you have to replant every single year, perennials come back season after season, often bigger and more robust than before.
They are the dependable workhorses of the garden, providing flavor, fragrance, and beauty with surprisingly little fuss. For me, planting perennials was an investment in the future of my garden. It meant less work each spring and a constant, reliable supply of my favorite flavors.
This guide is everything I’ve learned on my journey. We’ll walk through the entire process, from choosing the right spot to harvesting your bounty and even tucking your herbs in for the winter.
Whether you have a sprawling backyard or a small balcony, you can enjoy the satisfaction of growing your own perennial herbs. Let’s get our hands dirty and build an herb garden that will reward you for years to come.
Getting Started: Choosing Your Herbs and the Perfect Spot
The foundation of any successful garden is planning. With perennial herbs, a little forethought goes a long way, ensuring your plants thrive from their first day in the ground and return stronger each spring.
Selecting Your Perennial Herb All-Stars
The world of perennial herbs is vast, but some are particularly well-suited for beginners and offer a fantastic range of flavors for cooking. When I first started, I picked a few that I knew I’d use regularly. My advice is to do the same. Think about the dishes you love to cook.
Here are a few of my favorite, nearly foolproof perennial herbs:
- Rosemary (Salvia rosmarinus): This woody, evergreen-like herb is a culinary powerhouse. Its piney, pungent flavor is incredible with roasted meats, potatoes, and even baked into bread. It loves sun and despises wet feet, so well-draining soil is a must. I have a rosemary bush that’s now five years old and looks more like a small shrub; it’s one of the proudest parts of my garden.
- Thyme (Thymus vulgaris): Available in many varieties (English, lemon, French), thyme is a low-growing, spreading herb that forms a fragrant mat. It’s wonderfully versatile, complementing everything from soups and stews to chicken and vegetables. Thyme is exceptionally drought-tolerant once established and thrives in full sun. It also works beautifully as a ground cover or tucked between paving stones.
- Sage (Salvia officinalis): With its soft, grayish-green leaves, sage is as beautiful as it is flavorful. Its earthy, slightly peppery taste is classic in holiday stuffings, with pork, and in brown butter sauces for pasta. Like rosemary, sage demands excellent drainage and plenty of sunlight.
- Oregano (Origanumvulgare): If you love Mediterranean food, oregano is non-negotiable. This hardy, spreading herb brings a bold, peppery flavor to pizza, pasta sauces, and grilled vegetables. It’s incredibly easy to grow and will happily take over a patch of your garden if you let it. I recommend planting it in a container or a bed with defined borders to keep it in check.
- Chives (Allium schoenoprasum): A member of the onion family, chives provide a mild oniony flavor perfect for sprinkling over eggs, potatoes, and salads. They are one of the first herbs to pop up in the spring and are incredibly resilient. Their purple puffball flowers are also edible and look beautiful in salads.
- Mint (Mentha species): I have to include mint with a strong word of caution: it is an aggressive spreader. That said, its refreshing flavor is essential for teas, mojitos, and fruit salads. My personal rule is to only plant mint in containers. I once made the mistake of putting it directly in a garden bed, and I spent the next two years pulling it out of my lawn. A large pot on the patio is the perfect home for it.
Finding the Right Location: Sun, Soil, and Drainage
Most perennial herbs are native to the Mediterranean region, and that tells you almost everything you need to know about their ideal conditions.
Step-to-Step Guide to Site Selection:
- Become a Sun Stalker: For a day or two, observe your garden. You need to find a spot that receives at least 6 to 8 hours of direct sunlight. This is non-negotiable for herbs like rosemary, thyme, sage, and oregano. Morning sun is particularly good, as it helps dry the dew off the leaves, preventing fungal diseases. Herbs like chives and mint can tolerate a bit more shade (around 4-6 hours), but their growth will be most vigorous in sunnier spots.
- Assess Your Soil: Grab a handful of your garden soil. Does it feel light and gritty, or heavy and clumpy like clay? Most perennial herbs need well-draining soil. They absolutely hate to have their roots sitting in water, which can lead to root rot.
- Amend if Necessary: If you have heavy clay soil, as I do, you’ll need to amend it. This sounds complicated, but it’s pretty simple. You can improve drainage by mixing in organic matter. I dig a generous amount of compost, coarse sand, or fine gravel into the top 8-12 inches of my soil before planting. This creates air pockets and allows water to move through more freely.
- Consider Raised Beds or Containers: If amending your soil feels like too much work or you have very poor drainage, raised beds or containers are a fantastic solution. They give you complete control over the soil composition. For my containers, I use a mix of high-quality potting soil and a bit of perlite or sand to enhance drainage. This is how I manage my mint and have a beautiful rosemary plant right on my deck.
Choosing the right herbs and the perfect spot is the most critical step. Get this right, and you’re more than halfway to a thriving, long-lasting herb garden.
Planting and Care: Nurturing Your Herbs Through the Seasons
Once you have your site prepared and your herbs selected, it’s time for the fun part: planting. Proper planting techniques and a little seasonal care will set your herbs up for a long and productive life.
The Art of Planting Perennial Herbs
Whether you’re starting with small plants from a nursery or seeds, the goal is to get them established with minimal stress. I personally prefer starting with young plants, as it gives me a head start and a higher success rate, especially with woody herbs like rosemary.
Step-by-Step Planting Instructions:
- Timing is Everything: The best time to plant perennial herbs is in the spring, after the last frost has passed. This gives them the entire growing season to establish a strong root system before winter arrives. You can also plant in the early fall, but make sure to do it at least 6-8 weeks before your first expected frost.
- Give Them Space: Check the plant tag for spacing recommendations. It’s easy to underestimate how large these plants will get. A tiny thyme plant can spread to cover a two-foot area, and a small rosemary can grow into a large shrub. Giving them enough room from the start prevents overcrowding, which can lead to poor air circulation and disease.
- Dig the Right-Sized Hole: Dig a hole that is roughly twice as wide as the pot the herb came in and just as deep. You want the top of the root ball to be level with the surrounding soil. Planting too deep can cause the stem to rot.
- Gently Tease the Roots: Carefully remove the plant from its container. If the roots are tightly wound in a circle (known as being “root-bound”), gently tease them apart with your fingers. This encourages the roots to grow outward into the new soil instead of continuing to circle.
- Settle Them In: Place the plant in the hole, making sure it’s sitting straight. Backfill the hole with the soil you removed, gently firming it around the base of the plant to remove air pockets.
- Water Deeply: The most crucial final step is to water your newly planted herb thoroughly. This helps settle the soil around the roots and reduces transplant shock. Give it a good, long drink until the water has penetrated deep into the ground.
Ongoing Maintenance for Healthy Herbs
The beauty of perennial herbs is their low-maintenance nature. However, a little attention throughout the year ensures they stay healthy and productive.
- Watering Wisely: This is where many new gardeners go wrong. Once established, most perennial herbs are drought-tolerant and prefer their soil to dry out between waterings. Overwatering is the fastest way to kill them. I use the “finger test”: I stick my finger about an inch or two into the soil. If it feels dry, it’s time to water. If it feels moist, I wait. Water deeply and infrequently rather than giving a little splash every day. This encourages deep root growth.
- The Question of Fertilizer: Perennial herbs generally don’t need much fertilizer. In fact, too much fertilizer can lead to lush, leafy growth with a less concentrated flavor. The compost you mixed in at planting time is often enough for the first year. In subsequent years, I top-dress my herb bed with a thin layer of compost in the spring. That’s it. This slow-release nutrition is all they need to thrive.
- Pruning for Health and Vigor: Pruning is essential for keeping your herbs productive and well-shaped. For leafy herbs like oregano, chives, and mint, regular harvesting is your pruning. For woody herbs like rosemary, sage, and thyme, a more structured approach is beneficial. In the spring, after new growth appears, I trim away any dead or damaged wood from the winter. I also give them a light “haircut” trimming back about a third of the growthto encourage bushier, more compact plants and prevent them from becoming too woody and sparse at the base. Never cut back into old, bare wood, as it may not regrow.
By following these simple care routines, you’ll create an environment where your herbs don’t just survive, but flourish.
Harvest, Storage, and Winter Prep
The reward for all your hard work is a continuous supply of fresh herbs. Knowing how and when to harvest, what to do with your bounty, and how to protect your plants through the cold months will ensure you can enjoy them year-round.
Reaping What You Sow: The Art of Harvesting
Harvesting isn’t just about collecting ingredients; it actively encourages your plants to become fuller and more productive.
- When to Harvest: You can begin harvesting from your herbs as soon as they are established and have plenty of healthy leaves. For most, this is a few weeks after planting. The flavor of herbs is most intense in the morning, just after the dew has dried but before the sun gets too hot.
- How to Harvest: The rule of thumb is to never harvest more than one-third of the plant at a time. This ensures it has enough foliage left to photosynthesize and continue growing.
- For leafy, branching herbs (Oregano, Thyme, Mint): Snip off stems, cutting just above a set of leaves. This will encourage the plant to branch out from that point, creating a bushier plant.
- For clump-forming herbs (Chives): Use scissors to snip the leaves about an inch or two from the base. I like to work from the outside of the clump inward, which keeps the plant looking neat.
- For woody herbs (Rosemary, Sage): You can snip off the tender, new growth tips as needed. For larger harvests, cut back sprigs, but again, avoid cutting into the old, woody parts of the stem.
Preserving the Harvest
There will be times, especially in late summer, when your herbs are so productive you can’t possibly use them all fresh. This is the perfect opportunity to preserve them for winter.
- Drying: This is the classic method and works wonderfully for robust herbs like oregano, thyme, rosemary, and sage. Simply tie small bundles of stems together and hang them upside down in a warm, dry, well-ventilated area away from direct sunlight. Once they are crispy and crumble easily (usually 1-2 weeks), strip the leaves from the stems and store them in airtight jars. I have a spot in my pantry that’s perfect for this, and the fragrance while they dry is incredible.
- Freezing: Freezing is my preferred method for more delicate herbs like chives, as it preserves their fresh flavor better than drying. I chop them finely and freeze them in ice cube trays with a small amount of water or olive oil. Once frozen, I pop the cubes into a freezer bag. These are perfect for tossing directly into soups, stews, or sauces.
Preparing for Winter’s Chill
Protecting your perennial herbs during the winter is crucial for their survival, especially in colder climates.
- Stop Pruning and Fertilizing: In late summer or early fall, stop pruning and feeding your herbs. You want to discourage new, tender growth that will be easily damaged by the first frost. Let the plants harden off naturally.
- Mulch for Insulation: After the first hard frost, when the ground has frozen, apply a thick layer of mulch (2-4 inches) around the base of your plants. Straw, shredded leaves, or pine needles work well. This insulates the roots from the freeze-thaw cycles that can heave plants out of the ground. I wait until the ground is frozen because mulching too early can trap moisture and invite rodents to make a cozy winter home.
- For Tender Perennials: In zones colder than 6 or 7, herbs like rosemary are often not reliably perennial. You have two options: treat them as an annual or bring them indoors. I bring my potted rosemary into a cool, sunny room for the winter. It requires less water during this dormant period, but with enough light, it survives beautifully until it can go back outside in the spring.
- A Note on Sage: Sage is pretty hardy, but its leaves can suffer from winter wetness. In my rainy climate, I find that providing some sort of rain cover, like a loose cloche or even just a piece of plywood propped up over it, helps it come through the winter looking much better.
With these practices, you can close out the gardening season confidently, knowing your perennial herbs are tucked in and ready to greet you again next spring.
Common Mistakes to Avoid
Over the years, I’ve made my fair share of mistakes. In gardening, mistakes are just learning opportunities. Here are some of the most common pitfalls I’ve seen (and experienced myself) when growing perennial herbs, so you can hopefully sidestep them.
The Sin of Overwatering: I’ve mentioned it before, but it bears repeating because it is the number one killer of perennial herbs. We often show our love for plants by watering them, but for Mediterranean herbs, this is the kiss of death. Their roots are adapted to dry, gravelly conditions and will quickly rot in constantly soggy soil.
My Personal Lesson: Early on, I had a beautiful sage plant in a pot. I watered it every other day, just like my annual flowers. The leaves started turning yellow and dropping. I thought it needed more water. It wasn’t until I unpotted its sad, limp form that I saw the problem: the roots were brown and mushy. Now, I let the soil get visibly dry on top and use the finger test without fail. Less is truly more.
Planting in Rich, Over-Fertilized Soil: It seems counterintuitive, but pampering your herbs with rich, heavily fertilized soil is a mistake. While a bit of compost is great, excessive nitrogen (the main component in many all-purpose fertilizers) produces rapid, weak, leafy growth that has a diluted, less potent flavor. You’re growing herbs for their essential oils and intense taste, not for lush but bland foliage.
What to Do Instead: Stick to amending your soil with compost just once a year in the spring. Your herbs will be stronger, more resilient, and most importantly tastier.
Fear of the Pruners: Many gardeners are hesitant to prune their plants, worried they might hurt them. With herbs, the opposite is true. Failing to prune or harvest regularly leads to problems. Woody herbs like sage and lavender can become leggy and woody, with all the growth at the tips and a bare, unproductive base. Spreading herbs like oregano can get sparse and weak in the center.
My Advice: Be brave! Regular snipping is a haircut that encourages your herbs to grow thicker and healthier. Think of it as a conversation with your plant; you’re guiding its shape and energy.
The Enduring Joy of a Perennial Herb Garden
From that first hopeful planting to the simple pleasure of snipping fresh chives in the early spring, a perennial herb garden is a deeply rewarding endeavor. It’s an investment that pays you back season after season with flavor, fragrance, and the quiet satisfaction of self-sufficiency.
We’ve walked through choosing the right plants, preparing the perfect home for them, and caring for them through the cycle of the year. We’ve seen how a little bit of planning providing sun, ensuring drainage, and giving them room to grow can lead to years of abundance.
The key takeaways are simple: most perennial herbs thrive on a bit of neglect. They want sun on their leaves and dry feet. They ask for a yearly haircut to stay tidy and productive, and a blanket of mulch to sleep through the winter.
By avoiding the common pitfalls of overwatering and over-fertilizing, you create the perfect conditions for these resilient plants to flourish.
My own garden has been transformed by these dependable perennials. My old rosemary bush is like a friend that greets me every time I step outside, and the thyme creeping between my patio stones releases its scent with every footstep. It’s these small, daily interactions that make gardening so special.
Now it’s your turn. Start small. Pick one or two herbs that you love to cook with and give it a try. I promise that the first time you make a meal seasoned with herbs you grew yourself, you’ll be hooked.
I’d love to hear about your experiences! What perennial herbs are you planning to grow? Do you have any tips or favorite herbs that I didn’t mention? Share your thoughts and questions in the comments below.
Frequently Asked Questions (FAQs)
What are the absolute easiest perennial herbs for a complete beginner?
If I had to recommend just three, I would choose chives, oregano, and thyme. Chives are incredibly resilient and one of the first things to pop up in spring, and their mild oniony flavor is useful in so many dishes. Oregano and thyme are both drought-tolerant powerhouses that thrive on sun and neglect once they are established. They are very forgiving if you forget to water them.
My garden is mostly shady. Are there any perennial herbs I can still grow?
Yes, though your options are more limited. While most culinary herbs crave sun, a few can tolerate partial shade (about 3-4 hours of direct sun per day). Mint is famously tolerant of shadier spots, as are chives, lemon balm, and parsley (which is technically a biennial but often grown as an annual). Their growth might be a bit less vigorous than in full sun, but you can definitely still get a worthwhile harvest.
How do I know if my perennial herb has died over the winter?
Patience is key here. Some herbs, like thyme and oregano, may look completely dead and brown after a hard winter. Don’t be too quick to pull them out. The best way to check for life is the “scratch test.” Use your thumbnail or a small knife to gently scratch the bark on one of the main stems. If you see green underneath, the plant is still alive and will likely send out new growth from its base or stems once the weather warms up.
Can I grow perennial herbs in pots forever?
Absolutely! Container gardening is a perfect solution for many herbs, especially aggressive spreaders like mint or tender perennials like rosemary in cold climates. The key is to choose a large enough pot to accommodate the mature size of the plant and to ensure it has excellent drainage holes.
My sage/rosemary is getting really woody and bare at the bottom. Can I fix it?
This is a common issue with older woody herbs. It happens when they aren’t pruned regularly enough. You can try to rejuvenate them with a hard pruning in the early spring, but it’s risky. The rule is to only cut back to a point where there is still some leafy growth; cutting into old, bare wood often won’t stimulate new buds. A better strategy is preventative. Start pruning your woody herbs lightly every year after they finish flowering to encourage bushy growth from the base and maintain a compact, attractive shape.