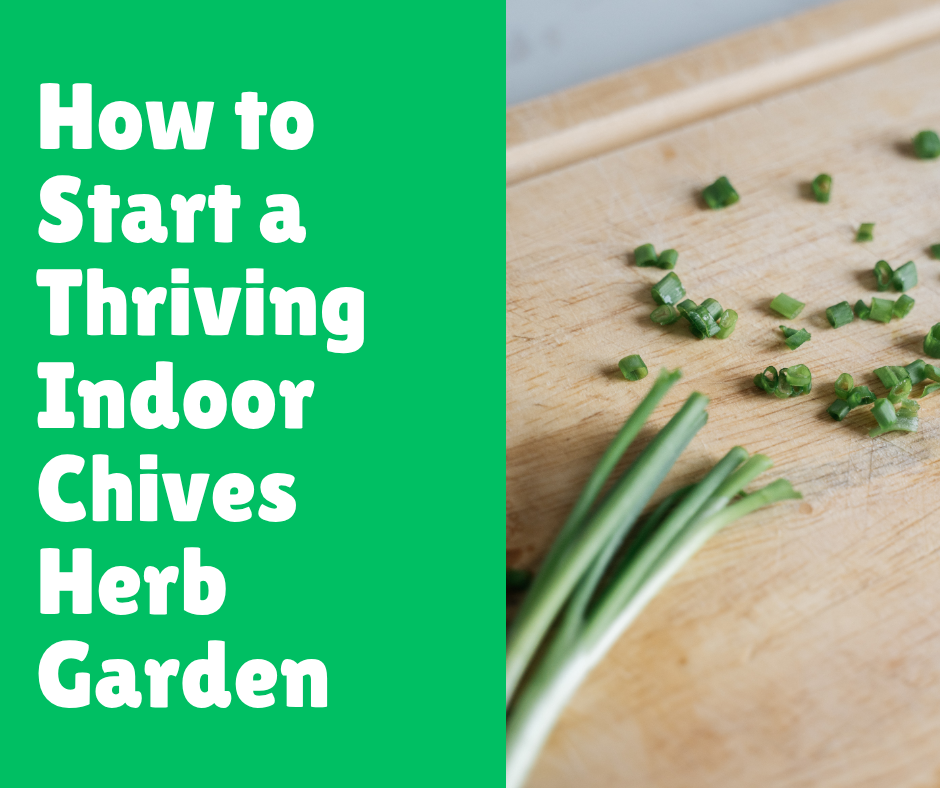
How to Start a Thriving Indoor Chives Herb Garden
Post Disclaimer
Content on this site is for educational use only and not a substitute for medical advice. Herbal remedies are based on traditional knowledge and not medical recommendations. Please consult a healthcare professional before trying any herb. We do not assume responsibility for any outcomes or adverse effects resulting from the use of information provided here.
I’ll never forget the first time I successfully grew something edible. It was a pot of chives on my tiny apartment windowsill. I’d always thought I had a “black thumb,” destined to kill any plant that crossed my path. But those chives? They were surprisingly resilient.
The first snip for my morning scrambled eggs felt like a monumental achievement. I had fresh, flavorful herbs right at my fingertips, and it cost me next to nothing.
Growing chives indoors is one of the easiest and most rewarding ways to dip your toes into the world of indoor gardening. It’s a project that brings a splash of green into your home and a burst of fresh flavor to your meals.
Forget those sad, plastic-packaged herbs from the grocery store that wilt in two days. We’re talking about a perpetually available, vibrant, and delicious supply.
So, are you ready to transform a corner of your kitchen into a mini herb oasis? Let’s walk through everything you need to know to start your own thriving indoor chives garden. Trust me, if I can do it, anyone can.
Why Bother Growing Chives Indoors?
Before we get our hands dirty, let’s talk about why chives are the perfect green roommate. It’s not just about having a fresh garnish handy, although that’s a huge plus. The benefits go way beyond that.
The Unbeatable Flavor of Freshness
There is simply no comparison between fresh chives and the dried flakes you find in the spice aisle. Fresh chives have a delicate, mild onion flavor with a hint of garlic that elevates any dish.
Sprinkling them over baked potatoes, mixing them into dips, or folding them into an omelet adds a layer of freshness that dried herbs just can’t replicate. It’s a small detail that makes a world of difference.
It’s a Money-Saver in the Long Run
Let’s be real, fresh herbs at the supermarket can be pricey, and you often end up with more than you need for one recipe. The rest sadly turns to green mush in your crisper drawer.
By growing your own, you invest a small amount upfront for a plant that continually regrows. You can snip what you need, when you need it, eliminating waste and saving you money over time.
A Touch of Green for Your Well-being
Having plants indoors is a known mood booster. They purify the air, add a touch of nature to your living space, and caring for them can be a genuinely therapeutic activity.
Watching your chives grow from tiny seeds or a small plant into a lush bunch is incredibly satisfying. It’s a simple joy, and who couldn’t use more of those?
They’re Incredibly Forgiving
Chives are one of the most low-maintenance herbs you can grow. They aren’t divas about their living conditions and can tolerate a bit of neglect.
Did you forget to water them for a day? They’ll probably be fine. Don’t have a south-facing window with perfect sunlight? They’ll adapt. This makes them the perfect starter plant for beginner gardeners.
Getting Started: Your Chive Garden Shopping List
Alright, convinced? Let’s get down to the nitty-gritty of what you’ll need. The good news is that the list is short and inexpensive. You don’t need a fancy, automated hydroponic system to succeed here (though if that’s your jam, go for it!).
Choosing the Perfect Pot
When it comes to containers, your main priority is drainage. Chives, like most herbs, absolutely hate having “wet feet.” Sitting in waterlogged soil is a fast track to root rot.
- Material: Terracotta, ceramic, or plastic pots all work well. I’m partial to terracotta because it’s porous and allows the soil to breathe, which helps prevent overwatering. Plastic is lighter and retains moisture longer, which can be good if you’re a forgetful waterer.
- Size: Look for a pot that is at least 6-8 inches deep and wide. This gives the roots enough room to establish themselves without being cramped. A deeper pot also means the soil won’t dry out as quickly.
- The All-Important Drainage Hole: This is non-negotiable. Your pot must have at least one drainage hole at the bottom. If you fall in love with a decorative pot that doesn’t have one, you have two options: drill a hole yourself (carefully!) or use it as a cachepot (a decorative outer pot) and place a smaller nursery pot with drainage inside it.
Finding the Right Soil Mix
You might be tempted to just scoop some dirt from your backyard, but please don’t. Garden soil is too dense, can contain pests, and doesn’t drain well in a container environment. You’ll want a specific type of soil for your indoor setup.
Look for a high-quality, all-purpose potting mix. These mixes are designed for containers and are light, airy, and sterile. They provide the right balance of moisture retention and drainage.
To give your chives an extra boost, you can amend the potting mix by adding a handful of perlite or coarse sand to improve drainage even further. I also like to mix in a bit of compost for some slow-release nutrients.
Seeds or a Starter Plant?
This is a classic “choose your own adventure” moment. There’s no right or wrong answer; it just depends on your patience level.
- Growing from Seed: This is the most economical option and, in my opinion, the most rewarding. Watching the first tiny green shoots poke through the soil is pure magic. Chive seeds germinate relatively easily, usually within 10-14 days. You’ll just have to wait a bit longer for your first harvest, typically around 60 days from sowing.
- Buying a Starter Plant: If you want a head start (and fresh chives sooner), buying a small chive plant from a nursery or even the grocery store is a great choice. You can often find them in the produce section alongside other live herbs. When you bring it home, you’ll want to repot it into your larger container with fresh potting mix. This gives it room to grow and thrive.
The Art of Planting and Caring for Your Chives
You’ve got your supplies, and you’re ready to plant. This is where the fun really begins. The process is simple, but paying attention to a few key details will set you up for success.
Step-by-Step Planting Guide
- Prepare Your Pot: If you’re using a terracotta pot, soak it in water for about an hour beforehand. This prevents the dry pot from wicking all the moisture out of your fresh soil. Place a small piece of mesh or a coffee filter over the drainage hole to prevent soil from washing out.
- Fill with Soil: Fill your pot with your chosen potting mix, leaving about an inch of space at the top. Lightly moisten the soil with a spray bottle or a gentle stream of water.
- Planting Your Chives:
- From Seed: Sprinkle the seeds evenly over the surface of the soil. You don’t need to be too sparse; chives grow well in clumps. Lightly cover the seeds with about a quarter-inch of soil. Pat it down gently.
- From a Starter Plant: Gently remove the plant from its original container. If the roots are tightly bound (a condition called “root-bound”), gently tease them apart with your fingers. Place the plant in the center of your new pot, and fill in around it with soil until it’s at the same depth it was in the nursery pot.
- First Watering: Give your newly planted chives a good, gentle watering. Water until you see a little bit trickling out of the drainage hole. This helps settle the soil around the seeds or roots.
Finding the Sweet Spot: Light, Water, and Temperature
Chives are pretty chill, but they do have some preferences. Getting these three elements right is 90% of the battle.
- Light: Chives love light. They need at least 6-8 hours of direct sunlight per day to be truly happy. A south-facing window is the ideal location. If you don’t have one, an east- or west-facing window can also work. If your chives start looking long, pale, and floppy, it’s a sign they’re “reaching” for more light.
- What if I live in a cave (or just a dark apartment)? No sun? No problem! This is where grow lights come in. A simple, full-spectrum LED grow light clipped onto a shelf or positioned over your pot can work wonders. You can set it on a timer for 12-14 hours a day and your chives will be perfectly content. IMO, grow lights are a game-changer for indoor gardening.
- Watering: This is where most people go wrong. The key is to water deeply but infrequently. Let the top inch or two of soil dry out completely before watering again. Stick your finger into the soil to check; if it feels dry, it’s time to water. When you do water, do it thoroughly until water runs out the bottom. Then, dump out any excess water from the saucer. Never let your pot sit in a puddle of water.
- Temperature and Humidity: Chives are comfortable at typical room temperatures, somewhere between 60-75°F (15-24°C). They aren’t picky about humidity, so you don’t need to worry about setting up a humidifier unless your home is exceptionally dry.
To Feed or Not to Feed?
Your potting mix will likely have enough nutrients to sustain your chives for the first few months. After that, you can give them a little boost. Feed them with a balanced, all-purpose liquid fertilizer diluted to half-strength about once a month during the spring and summer. Cut back on feeding in the fall and winter when growth naturally slows down.
Harvest Time! Snipping and Using Your Chives
This is the moment you’ve been waiting for! Harvesting chives is not only easy, but it also encourages the plant to grow back thicker and more robust. It’s like giving your plant a haircut that makes it stronger.
How and When to Harvest
You can start harvesting your chives once the leaves are about 6-8 inches tall.
- The Right Technique: Use a pair of clean scissors or kitchen shears. Cut the leaves about 1-2 inches from the base of the plant. Don’t just snip the tips! Cutting them down close to the soil encourages new growth from the base.
- Harvesting in Bunches: It’s best to harvest an entire clump of leaves at a time rather than randomly snipping individual leaves from all over. Work your way around the plant, cutting different sections each time you harvest. This allows the previously cut sections time to regrow.
- Leave Some Behind: Never harvest more than one-third of the plant at once. This ensures the plant has enough foliage left to photosynthesize and recover.
Delicious Ways to Use Your Fresh Chives
The possibilities are endless! Chives add a fresh, subtle oniony kick to so many dishes.
- Eggs: Scrambled, fried, or in an omelet. A classic for a reason.
- Potatoes: Sprinkled over baked potatoes with sour cream, mixed into mashed potatoes, or added to potato salad.
- Dips and Spreads: Stir them into cream cheese, yogurt-based dips, or sour cream for a zesty flavor.
- Soups and Salads: A perfect garnish for creamy soups or a fresh addition to any salad dressing.
- Fish and Chicken: Their delicate flavor pairs beautifully with fish and chicken dishes.
Pro-tip: Add chives at the very end of the cooking process. Their flavor is delicate and can be lost with prolonged heat.
Common Mistakes to Avoid (That I’ve Definitely Made)
We all make mistakes, especially when starting something new. Here are a few common pitfalls I’ve stumbled into so you don’t have to.
- The Overenthusiastic Watering Can: This is the #1 killer of indoor herbs. You love your new plant, so you water it every day to show your affection. This is a death sentence. Remember: let the soil dry out between waterings. Root rot is stealthy and often irreversible.
- Choosing a “Cute” Pot Without Drainage: I’ve been guilty of this. You find the perfect ceramic pot that matches your kitchen decor, but it has no hole in the bottom. You think, “I’ll just be careful not to overwater.” Spoiler: you will overwater. Drainage is essential.
- Giving It a Light Trim: Just snipping the very tips of the chive leaves seems like the polite thing to do, but it’s not effective. It can make the plant’s growth a bit stunted. Be bold! Cut the leaves all the way down to about 2 inches from the soil. The plant will thank you with vigorous new growth.
- Ignoring the Sunlight Situation: Placing your chives in a dim corner and hoping for the best won’t work. They need sun to produce that delicious flavor. If your plant looks sad, pale, and leggy, it’s screaming for more light. Move it to a sunnier spot or get a grow light.
- Forgetting to Harvest: It might seem counterintuitive, but not harvesting your chives is bad for them. Regular “haircuts” stimulate growth. If you let them go too long without trimming, the older leaves can become tough and the plant’s growth can slow down.
Conclusion: Your Journey to Fresh Herbs Starts Now
Growing your own indoor chives garden is a simple, affordable, and incredibly rewarding project. You get the satisfaction of nurturing a plant from a small start to a lush, productive herb, all while adding fresh, vibrant flavor to your cooking. It’s a win-win.
So, what are you waiting for? Your journey to becoming an indoor herb gardener can start today with a simple pot of chives. Go ahead and give it a try! I promise you’ll feel a little thrill every time you snip some fresh herbs for your dinner.
Have you ever tried growing herbs indoors? Share your successes (or funny failures!) in the comments below. I’d love to hear about your experience!
Frequently Asked Questions (FAQs)
My chives are flowering! What should I do?
Chive flowers are beautiful, edible, and have a mild onion flavor! You can sprinkle the petals on salads. However, flowering can sometimes cause the leaves to become a bit tough. To encourage more leaf production, you can snip off the flower stalks at their base.
Can I grow chives in just a glass of water?
While you can keep chive cuttings alive in water for a short period, they won’t thrive long-term. Chives need the nutrients and structure provided by soil to grow strong and produce new leaves consistently. It’s best to plant them in a proper potting mix.
Why are the tips of my chives turning yellow?
Yellowing tips can be a sign of a few different things, but it’s often related to watering. It could be a sign of either overwatering (leading to root issues) or underwatering (the plant is drying out). Check your soil moisture and adjust your watering routine accordingly.
How long will my indoor chive plant last?
With proper care, an indoor chive plant can live for several years! Chives are perennials, meaning they can live for more than two years. As long as you provide it with enough light, water it correctly, and harvest regularly, your plant will continue to produce for a very long time.
I see tiny bugs flying around my chive plant. What are they and what do I do?
Those are likely fungus gnats. They are annoying but mostly harmless to the plant itself; their larvae live in the top layer of moist soil. The best way to get rid of them is to let your soil dry out more between waterings.